Part 1 Video: Setup thanks.io

Optional. Scroll down to read written instructions instead.

Part 1: Setup thanks.io

See the video above for a visual walkthru.

1. Create a thanks.io Account

If you haven't already, begin by creating a thanks.io account.

Enter your email address at thanks.io to create an account.

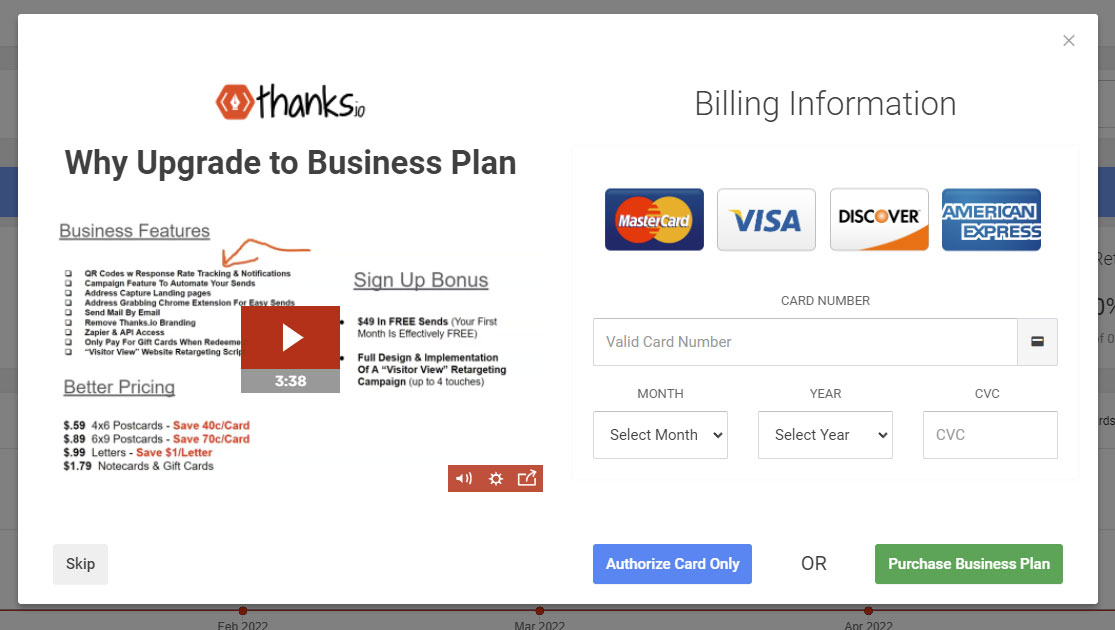
2. Setup your account

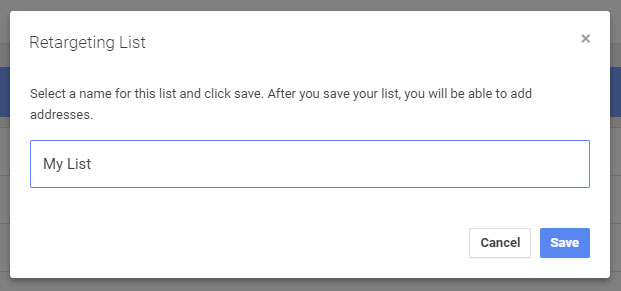
When creating an account you'll see the following modal . Enter your credit card and purchase the business plan at $50/mo (cancel anytime.)

https://dashboard.thanks.io/orders_history?modal_display=1

Alternatively, click on the 'gear' icon at the top right of the dashboard, and select 'Billing' from the drop down menu to change your subscription settings. Don't forget to save changes.

Enable Business Plan Access

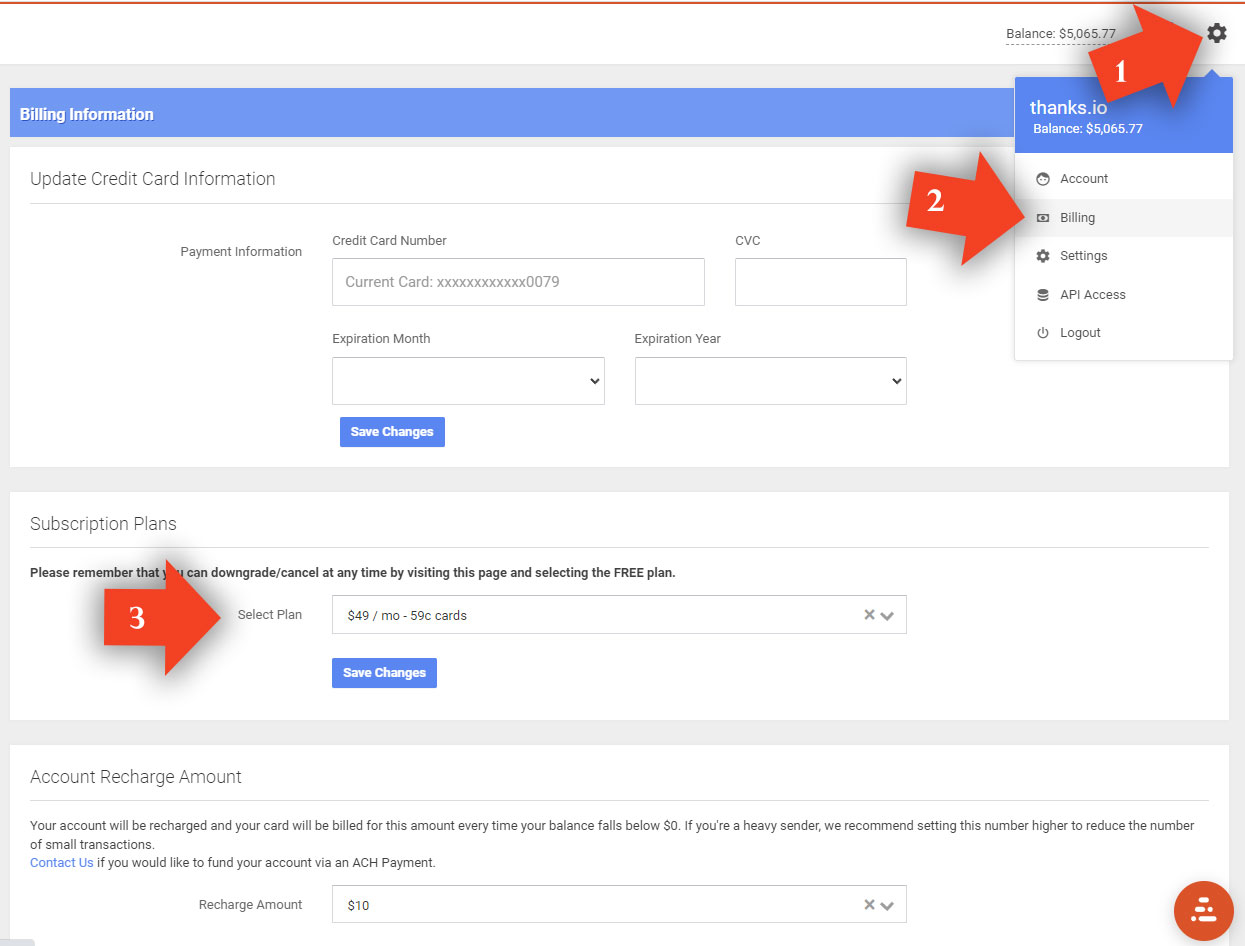
Although you may setup your connection to monday.com without subscribing to our business plan, in order for you to auto-send mailers to the recipients added to your list(s), will require features available only to business plan subscribers.

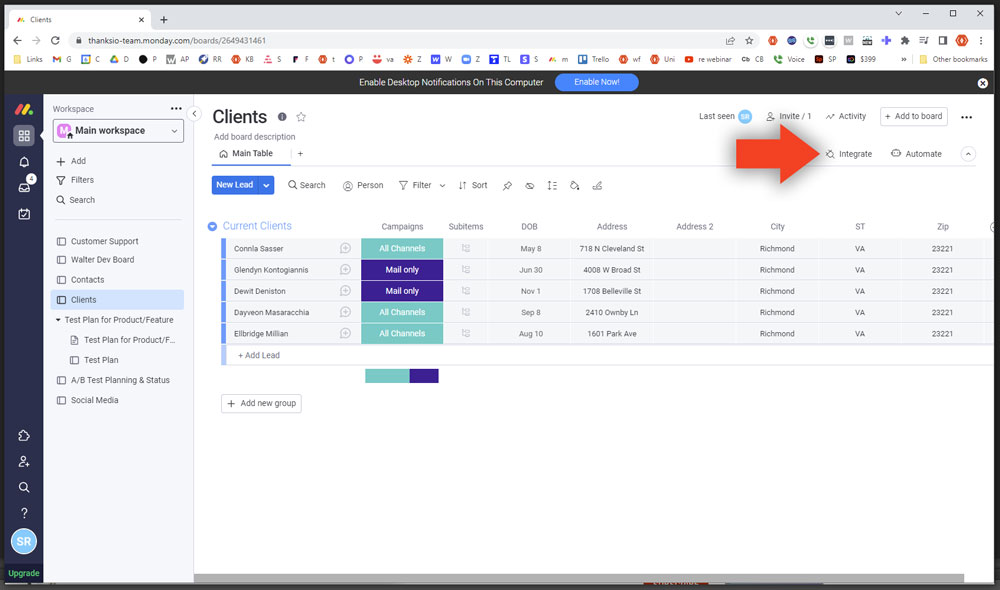
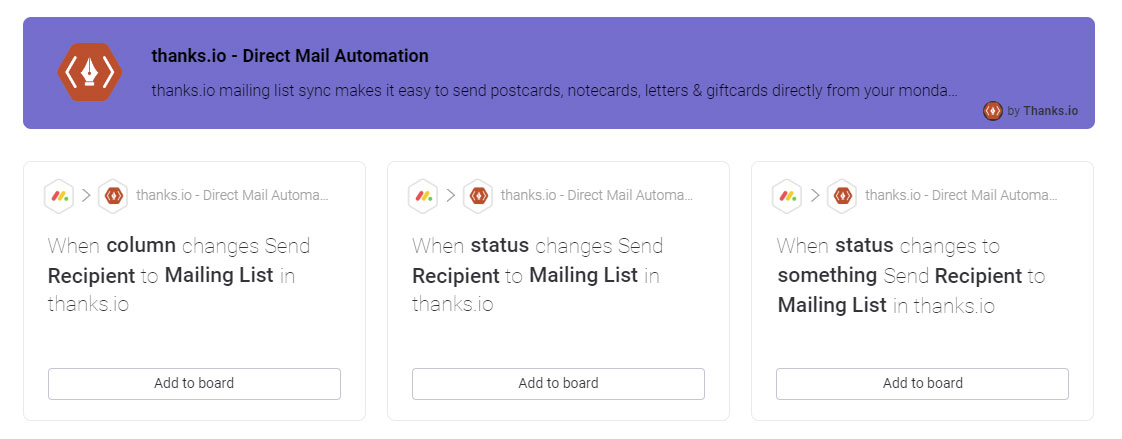
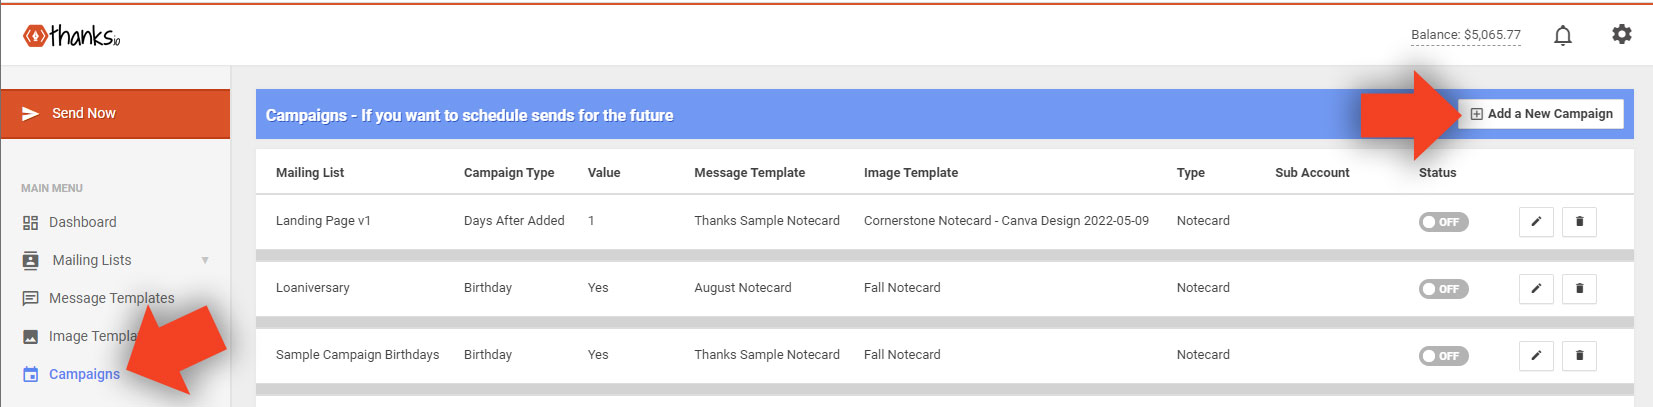
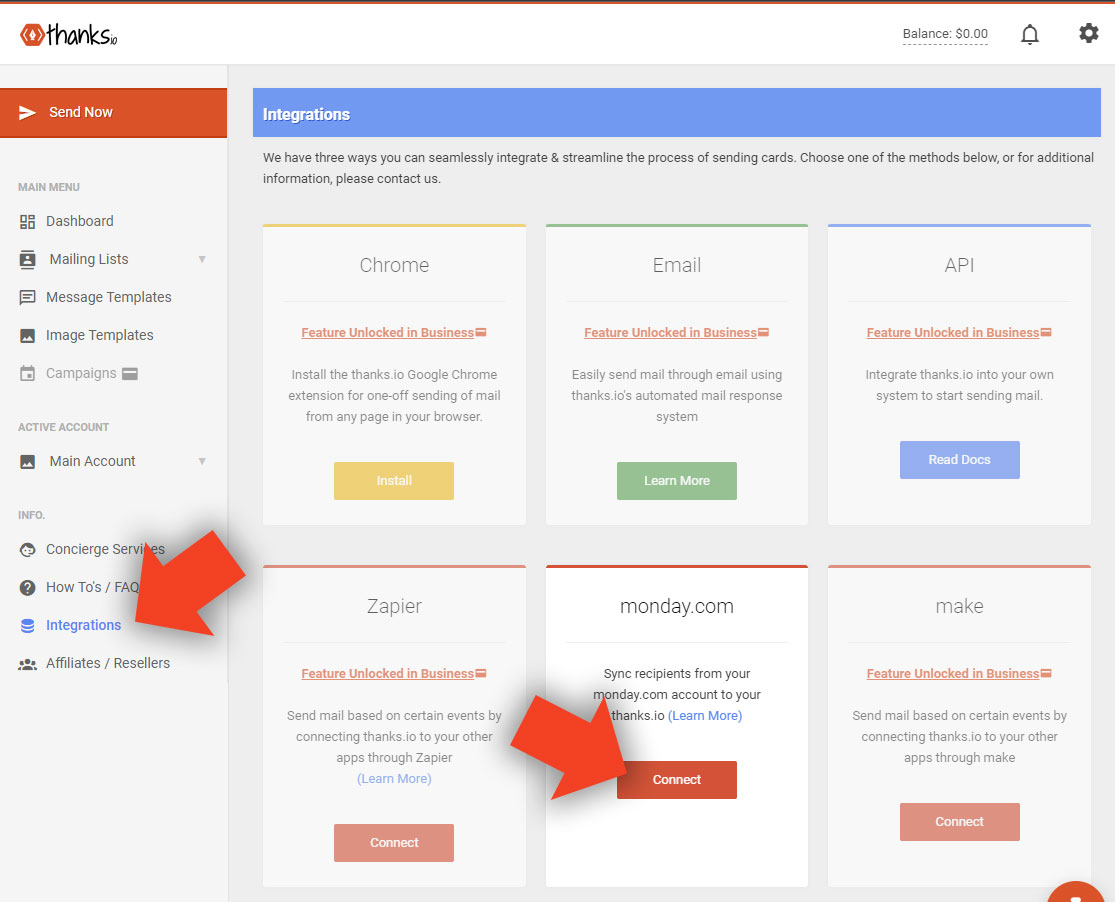
3. Connect to monday.com

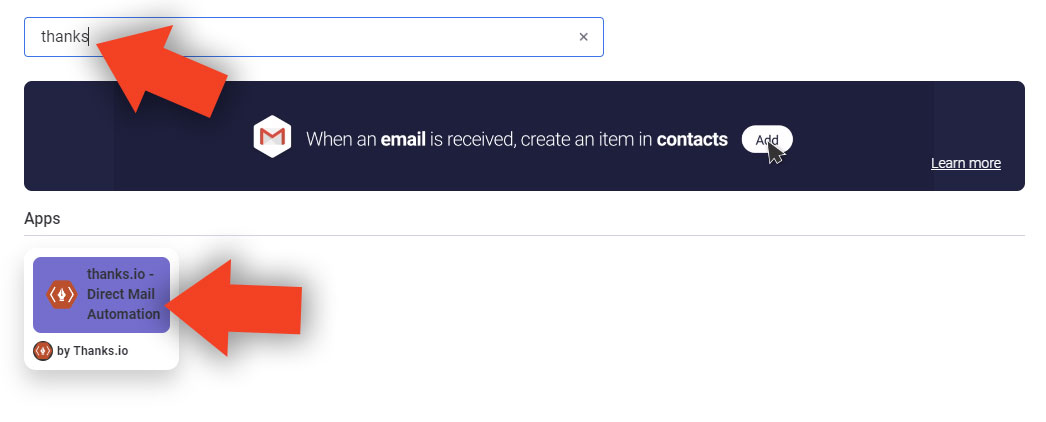
In the left hand navigation, click on 'Integrations.' Then, find the monday.com tile.
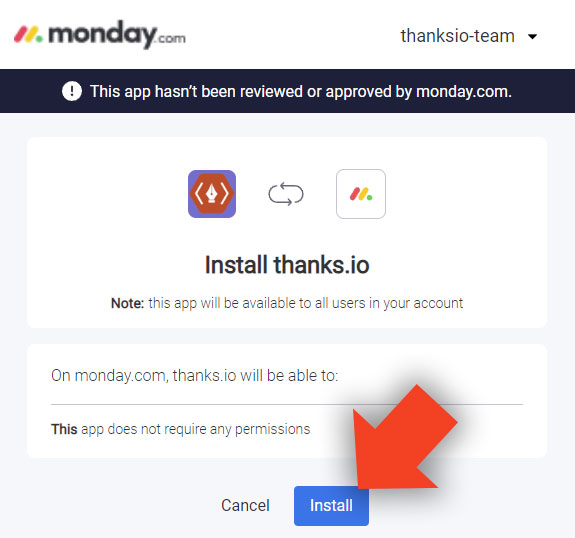
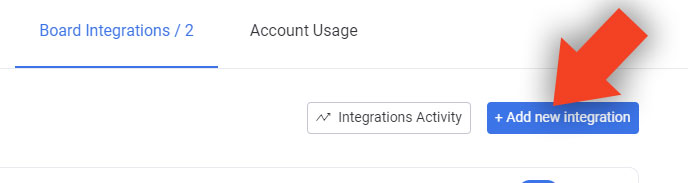
One-click connect to monday.com

4. Install App

This will open monday.com and prompt you to allow the installation of thanks.io. Click Install.

Part 2 Video: Setup Mailing List Sync

Optional video. Scroll down to read written instructions instead.

Part 2: Configure A Sync

Now we can setup the trigger to push leads or contacts from a monday.com board to thanks.io

NOTE: Your board in monday.com should have all of the contact information necessary to send mail via the USPS.

A monday.com board showing client name, a status that will be used to trigger the sync, and complete mailing address, address 2, city, st, zip.

1. Create A List in thanks.io

Before you can add any contacts to a list we need to create it. To get started, open the thanks.io dashboard.

1a. Open 'Mailing Lists' on the left.

1a. Open 'Mailing Lists.'

1b. Click on 'Create Retargeting List.'

1c. Give your list a name and click 'save.'

1c. Name your list.

2. Open Your monday.com Board

You should have a contacts board setup in monday.com that has all of the data you need (At least name and mailing address.)

An open monday.com board.

3. Click 'Integrate' at the upper right.

Click integrate at the top right of the board.

4. Click on 'Add New Integration.'

5. Search for and add thanks.io by clicking on it.

6. Choose Integration Type

You can opt to trigger the sync in 3 ways. When a column changes, a status changes, or if a status changes to something specific. For the purposes of this example, we'll be choosing when a status changes to something specific.

Mailing list sync trigger types

7. Assign Variables

On the sync-setup screen, choose each variable underlined in white text to connect with your particular board.

In this example, I created a status in my board for 'Campaign Type.' When I select the 'Mail Only' status, we'll add that contact to my 'Thank You Cards' mailing list in thanks.io.

Sync variables selected: When 'Campaigns' changes to 'Mail only' Send Recipient to Thank You Cards in thanks.io

To add a recipient, match the available columns setup in your monday.com board to the available headers in thanks.io.

8. Click 'Add to board' at the bottom right of the screen.

After adding the sync, you'll see it enabled on the integrations page.

Thanks.io mailing list sync configured and turned on.

Part 3 Video: Automating A Mailer

Optional video. Scroll down to read written instructions instead.

Part 3: Automating A Mailer

Once you are able to add contacts from monday.com to a thanks.io mailing list via sync, you now need to setup a Campaign in thanks.io which will automatically send your mail after such a recipient is added.

Visit help.thanks.io to lookup more detailed campaign setup instructions.

What’s a Campaign?

A Campaign is one mailer. You pick the type of mail, the design, and the message, and when to send it to someone who is added to a particular mailing list. You need to create a message template, an image template, and have a mailing list (an empty list is okay) to continue.

1. Create an Image

Click on 'Image Templates' on the left.

Then, at the top right corner, choose an option to add a mailer design. The buttons are in each section for Postcards, Letters, and folded Notecards.

Click 'Upload Postcard' to download a photoshop or Canva template. Click 'Design Postcard' to open Canva built into thanks.io, and click 'Done For You Design' if you would like assistance with a design. TIP: You can access 1000's of free templates via Canva when clicking 'design.'

2. Create A Message

Click on 'Message Templates' on the left. The, click 'Add Message at the top right corner.

3. Template Info

3a. Select the correct type of message for the design you added...

3b. Give your template an appropriate name that you will recognize later.
3c. At any time, you may click on a different handwriting style to select it. Any of the 'realistic' styles are recommended.

3d. Enter a complete, valid URL which will be auto-added to your mailer as a QR code. Each QR we print is automatically unique to each recipient. You will therefore be notified each time a card is scanned and by which recipient.

3e. As you type your message into the box on the left, it will be rendered on the right hand side. Click on the mail merge variables in the gray column at the right of the message entry field to select from the available mail merge variables. Optionally, you could forgo the handwritten message entirely and upload a custom background that has a printed/graphical message instead. With so many options, if you feel overwhelmed by what's possible don't hesistate to reach out to us or visit help.thanks.io to learn more.

Finally, click 'Save Message' at the bottom.

Don't forget to click save.

4. Open Campaigns, and add a new one

Click 'Campaigns' on the left and then click 'Add a New Campaign' at the top right.

Choose what to send in each field. The sending style has many different options for when to schedule. The soonest you can send is the next day. To do this, select 'Days After Added' and enter '1' into the field. This will send the mailer 1 day after a recipient is added to the list.